With decades of experience in mobile electronics I always want to have the best in audio, video and security for my vehicles. After all, I have spent most of my time away from my family providing this service to others – a hobby I get paid for. But when it comes to my personal vehicle I am extremely picky. I want the best from the best and I want reliability. Not only a monetary return on investment, I also want the peace-of-mind and satisfaction knowing that what I purchased was quality and will last trouble free for as long as I have the vehicle.
At my old age, I would like a new S Class Mercedes-Benz, but as much as I want one, it is not a need compared to other stuff that is coming down the road, new furnace, new siding, kid’s college tuition and vehicles for the kids as they get older. So, with that in mind, my wife and I shopped for a vehicle within a budget that had the features I wanted and a warranty to cover the purchase. In 2016 we purchased a 2015 KIA Sportage with push button start, proximity key, leather, heated seats, 4x4 AWD and a 100,000-mile bumper to bumper warranty. The audio system sound is not the greatest but a lesson over the years that I learned, and preached, was to always do the security of the vehicle first then add the upgrades.
This article is going to be about the security upgrades and the added convenience features I added to the vehicle to make the system work for my needs and wants. Currently, I have the new pre-production Viper DS4+ security with remote start system installed that should start shipping towards the end of the year. I originally didn’t have this system installed and I just recently switched out the older system that I installed 7 months ago with the new DS4+.
My goals, wants and needs are simple - peace of mind! I want to know that when I leave my vehicle parked, I will have a better chance of returning to it still there and un-molested. I want to be notified that if my vehicle is being vandalized, broken into, stolen or towed. Further, as a responsible adult, I believe that one owes it to the community to protect valuable such as firearms if left in the vehicle with an added layer of protection.
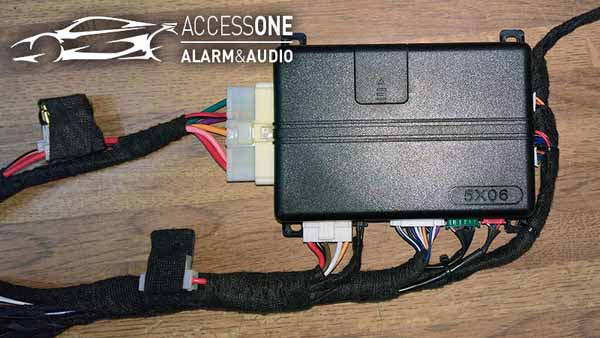
Pre-installation and prepping the 5606V control brain
Viper 5606V
With all the above in mind I started out laying out a plan of what equipment I will use. I am a loyal Viper supporter and I chose the Viper 5606V security with remote start system. Since the mid 1990’s I have used every major brand of security and remote start system on the market and installed thousands for customers. Viper is the world leader for a reason – quality and reliability!
I rounded out the Viper system with additional sensors such as a glass break sensor, tilt sensor, proximity sensor, battery backup and SmartStart GPS smartphone interface on top of the included dual stage shock sensor and starter kill that comes standard with the 5606V. I will elaborate on the individual sensors momentarily as there is also a critical element that needs to be mentioned, the data interface module.
The data interface module is the middle man that communicates with the vehicle and the Viper main system (5606V). At the time, last year when I went to install the 5606V, Viper did not have a solution for the data interface and I had to source one from a different company called Idatalink which makes very good quality and reliable interfaces. This interface should allow me to remote start the vehicle and provide the Viper 5606V with the status of the vehicles hood, doors and trunk over a data communication cable so I wouldn’t have the need to add those extra wires. Further, it should allow me to control the factory security system to arm and disarm with the Viper system, control the door locks along with the vehicles parking lights. In the past without the data module it would require running multiple wires to each individual trigger and other components of the vehicle, possibly including adding resistors and diodes. The data module alleviates all those extra wires as the vehicles computer already monitors it. I also want to mention that it takes hours off the time it takes to install the system.
As for choosing the 5606V over other systems, my goal was to use the factory key fob to arm and disarm the Viper system and by pressing the lock button three times on the factory fob, start the vehicle for distances where the factory remote control will reach. For further distances, I would use my Smartphone to control the Viper system with the Viper SmartStart GPS module. I can literally be on another continent and check the status of my vehicle, see the location, Lock the vehicle or arm the security system, unlock or disarm, pop the hatch, turn on the panic feature, or start the vehicle. This works on all smartphones including Windows and Blackberry, however it shines with IOS and Android based smartphones allowing you to see the interior temperature with a nicely organized modern app.
If Viper should of had a data interface at the time, I would have used the Viper 5610V or a 5X10 module. These are basically the same concept of the 5606V but considered a digital solution because the data interface is built into the 5610V or 5X10 where the 5606V uses an external data interface. If the factory fob would control the Viper system I most likely would have used the 5X10 from Viper.
Returning to the sensors and their purposes
.- Rechargeable Backup Battery: When the system is armed and if a thief were to cut the power from the battery, the backup battery will power the Viper 5606V and provide a trigger to set the alarm off. This sensor utilizes a Nickel-Cadmium rechargeable battery and is not limited to a one-time use. Integrated with the SmartStart GPS system I will receive a text, push notification on the app and an email stating my alarm is going off almost instantaneously. It would also power the siren alerting anyone nearby that my vehicle is being tampered with. This is not a very large battery and can be hidden in the dash with the Viper system and would be the first sensor I would recommend when building a security system. I would never expect it to last more than 30 minutes but with SmartStart GPS I know where the vehicle is and the police or myself will be there within that time frame.
- Proximity Sensor: The proximity sensor alerts with a warning when you are approximately 1-2 feet away from the vehicle. If someone were to reach into the vehicle the alarm would instantly trigger.
- Tilt Sensor: Should the vehicle be towed or jacked up to steal the wheels, the alarm would instantly trigger. This sensor can be set between 1 or 3 degrees to trigger the security system. Since it is a digital tilt, it does not care if you park on a hill or a flat surface. Once the security system is set, the sensor turns on and sets a reference point.
- Glass Break Sensor: This sensor has a microphone that picks up on the frequency of glass breaking or metal on the window such as a slim jim and triggers the alarm.
- Dual Stage Shock Sensor: This sensor is included in all the Viper security systems and emits a warn away when the sensor picks up a lighter impact or activates the alarm when it detects a heavy impact.
- SmartStart GPS: This is an add on subscription based interface that also communicates with the Viper system. Besides sending commands to start, lock, unlock, hatch release or turn on the panic feature it also notifies me when the alarm is going off, where the location of my vehicle is in real-time, and if my battery is getting low. Other features that it has but I don’t use are the over-speed notification which would alert me if the vehicle is exceeding a limit I set and a geofence which lets me know if the vehicle leaves a predefined area that I setup. Those are great features if you share your vehicle with teenagers or friends and need to gauge their responsibility level. When the SmartStart receives an alert, you can setup it so not only do you receive a push notification on the app, but you also receive a text message and an email. For the record, there is a scaled down basic version that has no GPS tracking ability and has a less expensive yearly subscription rate.
- Starter Kill: This will interrupt the starter wire when the security system is active making it hard to hotwire the vehicle. I did hook it up even though the vehicle has a transponder based key and it is virtually impossible to hot wire to begin with.
With all the bases covered comes the installation. I am of the old school installation class and believe in a few basic principles when it comes to security. Hide the brain, make the wiring look like factory or at least blend with the factory wiring and solder all connections. Don’t make it easy for the thief to go under the dash and disconnect it.
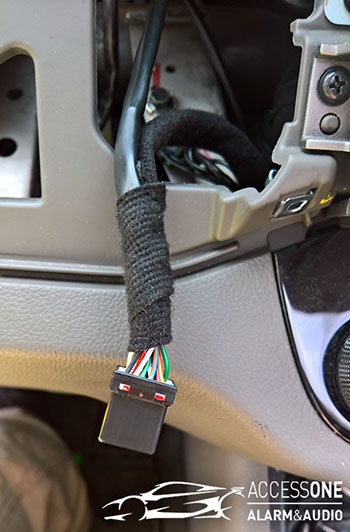
PVC tube wiring for the start/stop button
Onto the Install
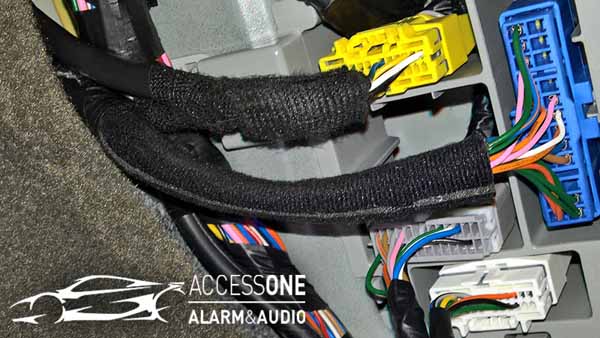
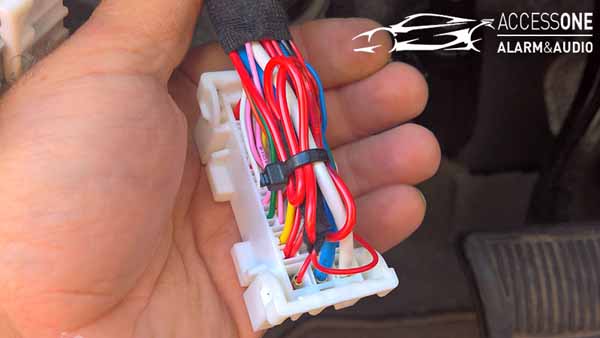
I start by planning the system wiring out, where the connections are going to be at in the vehicle and group those wires together working from the control brain of the 5606V outward, removing any wires from the Viper harnesses that are not being used. There will be one large harness from the brain that splits into smaller harnesses, some going left, some going right and then onto their destination of the factory wiring harness or where the sensors will mount. All the wire runs are taped together with cloth Tesa tape to appear factory and to protect the wires from chaffing or grounding out on metal. If it is a long run, such as in my case to the passenger kick panel, I will run the wire in a black PVC tube.
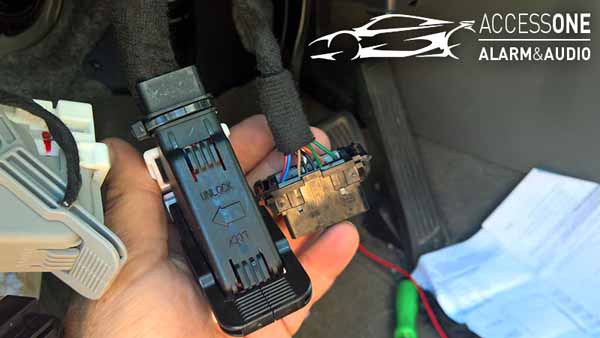
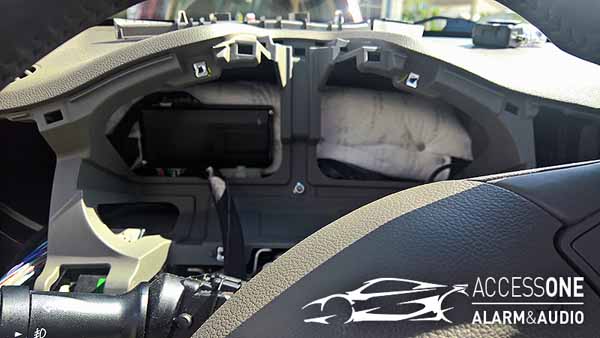
Since the 5606V is analog, I made a special harness that allows me to unplug the SmartStart and plug in the BitWriter, a tool that allows you to program inputs and outputs. This was done so I wouldn’t need to remove the cluster to access the 5606V brain to make changes once mounted. I made this connection accessible behind the driver’s side dash panel. Also accessible there, is the Idatalink data interface module as it needs to be removed and flashed via a computer. Mounting the Viper 5606v brain was a bit time consuming as there was no place that was well hidden on the driver’s side of the dash. As picky as I am, I disconnected the battery and removed the instrument cluster and hid the unit behind it where there was room for it. This did come back and haunt me as I needed to add wires to the install and had to remove everything to gain access to the 5606V brain.
I will mention that KIA did a great job with their wiring and electronics. A few years ago, I worked for a dealership specializing in high-end Mercedes-Benz, Maybach, Porsche, Maserati and Aston Martin vehicles and the Sportage is well put together and equipped with high-end electronics like the luxury lines. I did also end up removing the interior drivers side fuse box I/P Junction Box to aid in making the connections to the factory wires and for a clean wire run. Some of the factory plug covers were removed to hide the connections underneath it. The goal is to make it more complicated for a thief and self-pride, should a KIA technician have to access the under-dash area in the future, they would not see a mess of wires that they normally see when aftermarket equipment is lazily installed.
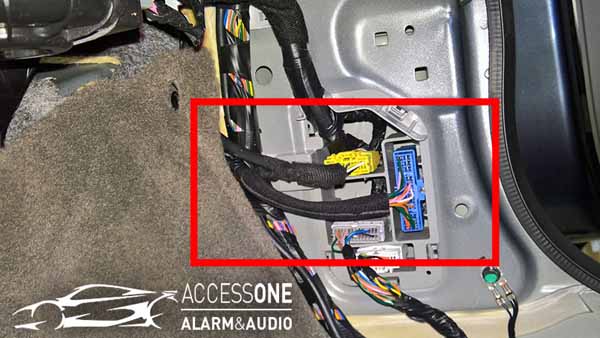
PVC sleeving for wires to passenger kick panel
After all the connections were made and the inputs and outputs were configured I started to test it. The first problem arose, 3X or three times lock does not work. The Idatalink module instructions make no mention of it not working with a Viper system. This ruined my day as I just spent many hours to make it perfect. Sure, I could have added a Band-Aid PAC TR7 trigger module off the vehicles lock wire to enable the Viper to start, but it would always be on and I did not want any extra drain on the factory electronics. So now I had to run the antenna and use a Viper remote control. No more just carrying the factory smart key in my pocket as I hoped.
Needless to state I was extremely disappointed at this point. Everything worked perfectly with all the added Viper sensors along with arming and disarming of the Viper through the factory key or the push button on the door handle except for activating the remote start. I had two choices now, either carry the extra Viper remote or use the SmartStart to activate it. Utilizing the smartphone to activate the remote start seemed like an efficiency torpedo when I am looking out the window at the vehicle 10 feet away. I would have to open the app on the phone and send the command to start. I ended up gluing the Viper 1-way 7656V remote control that comes with the 5606V to the kitchen wall. Problem solved with a Band-Aid.
Problem 2 arose a few hours later when I went to remote start it, the factory security system went off. Here came Band-Aid number two. I had to set the Viper to disarm and unlock the doors prior to remote starting, then lock and arm the system once the vehicle was running. Come on, seriously! Again, the data module was the cause and I would have to switch over from digital communication with the Viper brain to analog according to the Idatalink tech support. This would require accessing the brain behind the cluster and populating both the Viper and Idatalink harnesses for the analog inputs. Basically, a full day for me but it would still not correct the first problem so it was put on hold.
A few days later I stopped at a gas station to get some coffee and a much-needed Snickers candy bar as I was feeling like Betty Davis in the commercial. I have hidden in plain view a remote start activation button so I can park the vehicle and activate the remote start, keeping the vehicle running while I run inside, this feature is called the pit-stop mode. This did not work, but I never relied on it working to begin with as the vehicle is a push-button start transponder based vehicle.
Overall the Viper 5606V with the Idatalink interface is a good system, and I never had any theft or damage to the vehicle but I would give it a 6 out of 10 rating due to the quirks it had. Complicating matters was that I used two separate manufactures; Viper and Idatalink, which made troubleshooting a challenge, each blaming each other without coming up with a solid fix, just work arounds.
But wait, here comes a conversation with long time friend Craig Norman, Viper rep extraordinaire. He mentioned this super Viper system in the works that will be the latest technology and the best that Viper has ever offered called the DS4. Amazingly one showed up on my door step, a pre-production Beta unit with Viper needing feedback on it. So off I go…
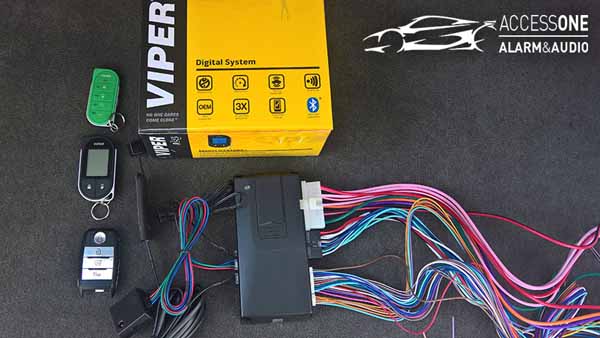
DS4+ System unboxed shown with remote controls
The DS4 Saga
After receiving it I opened it up and looked at the brain and noticed that all the fuses are built into the brain, and like the 5X10, the brain incorporates a data module. There are 2 versions of the DS4, one with built in high current relays called the plus or DS4+ and one without, called a DS4. I had the version with the high current relays (DS4+) however they and the associated wires were not used for my application.
I have been out of the alarm and remote start installation loop for quite a bit of time while working with the luxury brands at the dealership, so the Viper systems progressed over the years and some changes were made to the way they operated and how they were installed that I was somewhat familiar with or at least could figure out without a tech call. However, the directions that came with the DS4+ seemed like another language to me. This system seemed to evolve as if it came out of Area 51. Inputs could be outputs, outputs could be inputs, they can be configured for timed, latched, pulsed, when remote start is on, when security triggers, temperature activated and so on. But the best part of the new DS4 is the programming of the brain. You pair your phone via Bluetooth to the DS4 system and you are done! No more hooking to a PC, using a Bitwriter or the XK loader as the middleman between your phone and Viper system.
I was gearing up for round two of the new install. I run my vehicle model through their database for compatibility and my smart key equipped KIA is not supported. I laugh to myself and shelf it on my island of misfit toys (the garage). About a month later I look again and there it is, software for my vehicle! Looking over the features I noticed that it stated NA for “factory key keeps working” when the vehicle is remote started. That was a bit disheartening but I moved on anyways as I seen that it was 3X start compatible. It took about a week of planning as to when I would have the time to do the de-install of the previous 5606V/Idatalink and install the new DS4+. Let it be noted that with the DS4+ and available Viper software for it, no outside 3rd party interface such as the Idatalink interface was needed. I had time on Saturday afternoon and planned it out, looked at the weather and it said sunny to partly cloudy. It was on! I would do it Saturday at the house so I could still enjoy my family.
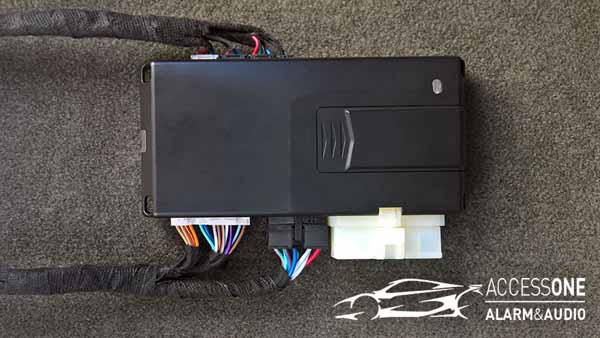
Pre-installation and prepping the DS4+ control brain
The DS4+ Install
Saturday afternoon comes and at this point I had a generic installation sheet letting me know which wires needed to be connected only. I flashed the DS4+ with vehicle specific software utilizing my PC and not the IOS app from Viper as I wanted to check out some of the user selectable options from the comfort of my home office. I did not change any of the inputs or outputs as there would be no tech support from Viper over the weekend and I did not want to mess anything up.
I began by prepping the new unit and removing any wires that would not be used. For my vehicle, the high current relay wires wouldn’t be utilized so I removed them from the plug and inserted the empty plug back into the DS4+ system to protect the pins on the unit. In reality, I should be utilizing the DS4 instead of the DS4+ as I do not need the high current analog output wires for my vehicle application. However, the robust DS4+ system will work the same as if I were to have a DS4, plus this is what Viper sent me. A quick note – should it have been the DS4, it would have been approximately 2 inches shorter in length. There were some wires I was not sure about if or how I would use them in the future, so I ran those separate in their own harness that would end up on the side of the drivers dash behind the access panel if I were to need them.
Once the harness was prepped it was time to remove the old system. I started by opening the windows and sunroof and then disconnected the battery. I then removed the driver’s side under dash, steering column shroud, instrument cluster trim bezel, the instrument cluster and then the fuse box or I/P Junction box. I carefully removed each individual wire of the old system and there were many. All the work done on the previous system to make it hard for a thief, made it just as hard for me. Believe me when I say it took two hours in which I asked myself several times why did I tape all those wires like that.
During the removal, I noticed that I didn’t have the correct plug for the SmartStart system to interface the DS4+. I had the old analog plug which wouldn’t work. It was a beautiful day out, so I left the vehicle open and just placed the stuff in the hatch careful not to close it all the way as there is no power for the hatch to unlatch. Off to Access 1 Alarm and Audio to pick up the correct plug, which wasted about an hour and a half of installation time. I get home and the wind must of blew the hatch closed enough where it latched and I couldn’t open it. I had to reconnect some wires and tape others off, re-install the fuse box, put the instrument cluster back in and then reconnect the battery to retrieve the DS4+ out of the hatch. Half hour later I was back in business and I am sure the install gods were laughing at me.
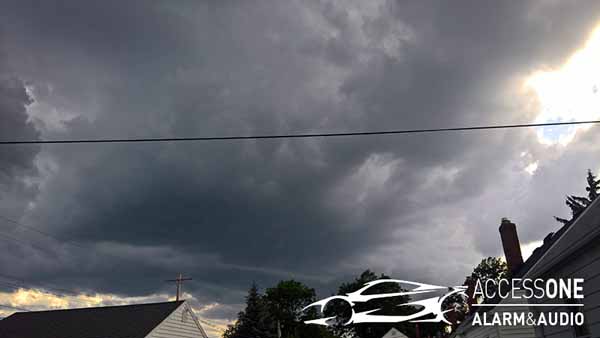
The storm that the install gods threw at me
An hour later I now have the old system completely out and I am about to start the install when the temperature drops about 10 degrees. I look up and there is a thunderstorm cloud fast approaching that goes to the horizon and is only a mile or two wide coming straight down the street. Really? My vehicle is again immobilized, the windows are down, the sunroof is open, the computer is out, battery disconnected and there are several bare wires. Off to the races I went to temporarily tape the wires, re-install the 7 plugs on the fuse I/P Junction box and reconnect the battery to close the vehicle up. I made it with only getting a little wet before the deluge came.
For the hour it poured rain, the sun was out for most of the time and only seemed as if it was just raining on our block. After the rain, the install seemed to go smoothly installing the new system. I no longer used the tilt or shock sensor from the previous 5606V system as the new system includes a 3 in 1 shock, tilt and temperature sensor which are plugged in on a data port. Also not used was the proximity sensor, as it is currently not compatible with the new digital system, however Viper stated that it is in the works. Both the glass break and the backup battery were hooked up to the instant trigger input of the new DS4+.
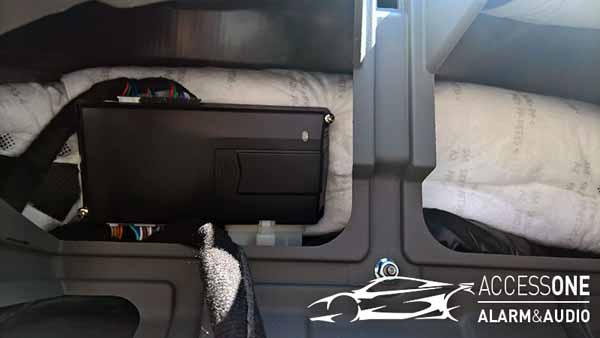
DS4+ mounted behind the instrument cluster
All of my connections are now made and I mount the brain to the air vent feed tube behind the cluster, reconnect the fuse box, install the cluster, and put the instrument cluster shroud that houses the push-to-start switch back on and reconnect the battery. I press the factory push-to-start switch and nothing happens. I press it a few more times and nothing. The factory fob locks and unlocks the doors but there is no ignition or start and it is getting dark out. So, I revert to the instruction manual and it states to plug in everything except the 12-pin harness, plug it in last than place the system in learn mode. Here we go removing the push to start switch, shroud and cluster. This time I left the cluster connected but hanging out of the way and the remote start switch I unbolted from the cluster shroud just in case I had to remove and replace a few more times. But, I did as the instructions stated and it worked perfectly.
Before I start to put everything back, as I know now that the install gods are in tears laughing at me, I do a few checks of system functionality. SmartStart works, lock and unlock work and for the grand finale 3X lock to remote start it. It works! Not only does it work, the key still unlocks the vehicle when the vehicle is remote started. Further, I noticed that if I have the proximity key in my pocket, I can unlock the door via the push button on the outside door handle to enter the vehicle while it is running with the Viper remote start system. No more fumbling for my keys if my hands are full. DS4 I love you! Take-over to drive away is a simple 2 pushes of the factory push-to-start button before you press the brake switch to shift out of park. This is how I wanted it from the beginning.
I put the vehicle completely back together and took the vehicle up to the local mall parking lot as it was too late at night to set the shock and tilt sensors as the system is extremely loud when triggered. This DS4+ included the 2-way LCD 1-mile 7756V remote control and I also had a 7857V 2-way 1-mile LED remote control. The 7857V is the new Viper 2-way LED remote control that incorporates a built in rechargeable battery and replaces the 7856V. I used them both to set the shock and tilt sensor as I have yet figured out how to configure with the phone over Bluetooth.
Monday afternoon I tried the pit stop mode while at the gas station to see if it worked. I pressed the remote start button on the LCD remote control before exiting the vehicle and it showed the vehicle in remote start mode, however getting out of the vehicle and closing the door emitted the factory warning beep that warns you are exiting the vehicle with the car running and the key not in the vehicle. I locked it via the LCD remote and went inside and when I came back I used the remote again to unlock it and get in. When I pressed the factory push-to-start button it seemed that it wanted to work in pit stop mode but the timing was off. I tried it a few more times and found that if I press the remote start button to activate the remote start for pit stop mode, and press the factory push-to-start button once, it will turn off the radio and lighter, allowing you to get out and lock the vehicle with the factory key as it is running. I am impressed, we know have pit stop mode! Since I will normally not be using any of the Viper remotes with this system, I do have a hidden remote start activation button that I can press while inside the vehicles cabin to enable pit stop mode without utilizing a Viper remote control. I am officially overjoyed with this system.
I followed up with Viper tech on a few questions and informing them that it works flawlessly, the key stays alive and pit stop mode works. Another feature that also works is that the parking lights illuminate during remote start when the light switch is in the auto position. This sounds trivial, but KIA has a lighting circuit that when the stalk is in auto, the parking lights do not flash or stay on during remote start with previous remote start systems. I also learned how to pair an iPhone to the DS4 to set up the software and configure the 500 options it has.
The Viper support technician instructed me on how to have my heated seats and defroster come on at 50 degrees. I currently had it disconnected because the basic instruction manual did not cover the options. Again, this is a beta pre-production unit which is going through testing before they start shipping them for consumers. Another nice feature of the DS4 is the built in Bluetooth SmartStart function. This will be SmartStart-lite in my opinion. Once installed in a person's vehicle, they will be able to download the SmartStart app from the Google Play or iTunes Store, open up the app, select Bluetooth, pair their phone and you have the SmartStart system when in range of the vehicle. Nice!
I am currently debating if I am going to add the Viper power window open/close module to the DS4+ system to control all 4 windows and the sunroof. This will give me what is called comfort control. I can exit the vehicle with the windows open, press lock on the fob to arm the Viper and the windows will roll up and the sunroof will close automatically. Further I can vent or roll down the windows utilizing the SmartStart system or the Viper remotes if I chose to use them. The debate with myself rages on because after inspecting the driver’s door boot where I would have to run many wires through it, there wouldn’t be enough room for all the wires. I was also considering that I could mount the window modules in the driver’s door, but I believe the longevity will be sacrificed due to the weathering that the door sees through the seasons.
I can’t say enough positive things about the new Viper DS4 system. I was informed by the Viper rep that there will be plug and play T-harnesses available for many of the current vehicles when the DS4 systems are released. What does that mean? Well unlike me working in the dark to finish my system, a tech working in the dark would mean he is probably on his 10th install of the day thanks to the T-harness solutions. The T-harness facilitates in a speedy and clean install as it usually makes all the critical connections via a vehicle specific plug-n-play harness. Just unplug the factory harness from the control module and insert into the T-harness, then plug the T-harness into the factory control module. Let it be written for those out there that think, “Oh, I can do that”. You will still need to flash the unit with software, understand today's modern electronics, access the under dash and steering column, and make a few connections as not all the T-harnesses account for every connection. If you are like me and want to have the defroster turn on, the seats heated or roll up and down the windows, there will be more wires to run and connect to make that happen.
Next on my list is to register it for the CTP program or Content Theft Protection as it is known. CTP is Viper’s $2,500 guarantee that while your Viper security system is armed and activated your system will protect your vehicle and valuables from theft or vandalism. Viper will reimburse you up to $2,500 the cost of any contents of the vehicle stolen such as a laptop, audio system, golf clubs, wheels, etc. or if your vehicle is vandalized such as broken windows or keyed. It is a one-time use good for 3 years, just fill out and submit a police report. This is an added peace-of-mind for me and I am sure it would benefit many other people out there also that leave valuables in the car time-to-time.
One Week Later
Well it is officially a week since installed and I want to report that I love it even more. Everything works as I believe it should and I have even stopped carrying the Viper remote controls. I have even forgot that it is installed it is so well integrated. My daily Viper experience starts with me telling Siri to start my car before I leave or pressing the factory fob lock button 3x. About 10 minutes later I walk out to a running vehicle and press the button on the door handle to get in. The system unlocks and once in, I press the factory start/stop push button switch twice and drive away. A few days prior it was cool enough that the seat heater was on when I got into the vehicle, what a nice surprise that was. I have used the pit stop mode a few times and have yet to have any false alarms. I am impressed and beyond satisfied with the DS4 and I have not found or experienced any issues with the system as of today. I am still debating on the power windows and will most likely add them when I have more time. Maybe the install gods will show some mercy this time around.
If you have any questions regarding application or operation, contact Access 1 Alarm & Audio as they have decades of experience with Viper and are a DS4 Certified dealer.
The following are the images from the first Viper system 5606V followed by the new DS4.


